
Optimizely - Install the Quickchannel Episerver Plugin (Optimizely 12)
Optimizely – Install the Quickchannel Plugin (Optimizely CMS 12)
This article covers installing the Quickchannel plugin for Optimizely CMS (formerly Episerver) version 12.
For Optimizely CMS 13, see Optimizely – Install the Quickchannel Plugin (Optimizely CMS 13).
For Episerver 9, 10 and 11, see Episerver – Install the Screen9 Episerver Plugin.
| Plugin version | Optimizely CMS | Target framework |
|---|---|---|
| 2.x | 13 | .NET 10 |
| 1.x | 12 | .NET 5 / .NET 6 |
To install the plugin you need administrator privileges on your Optimizely CMS and on your Quickchannel account.
1. Create a REST API access token
In the Quickchannel console, create a REST API access token with Read, Write and Upload privileges.
We recommend setting the access level to Public so that only approved media is displayed. However, if editors are allowed to upload media from Optimizely, the token must be Full – otherwise an uploaded video will not be visible afterwards.
See How do I create a REST API Access token? for details.
You also need the account ID (six digits, also known as custid).
2. Install the NuGet package
Install Screen9.Optimizely.CMS.UI. It brings in Screen9.Optimizely.CMS and EPiServer.CMS.TinyMce automatically – do not add them separately.
Visual Studio
- Right-click the project and choose Manage NuGet Packages…
- Set the package source to nuget.org
- Search for
Screen9.Optimizely.CMS.UI, select the latest 1.x version and install it
Command line (also Rider, VS Code, macOS and Linux)
dotnet add package Screen9.Optimizely.CMS.UI
3. Add the Quickchannel configuration
Add the following to appsettings.json:
{
    "Screen9Settings": {
        "AccountId": "123456",
        "RestApiToken": "Token_value",
        "Disabled": false
    }
}
| Setting | Meaning |
|---|---|
AccountId | The six-digit account specifier (custid). |
RestApiToken | The Quickchannel REST API token from step 1. |
Disabled | Optional. Set to true to switch the Quickchannel content provider off without removing the package. |
If editors upload large files, raise the CMS upload limit as well:
{
    "EPiServer": {
        "CmsUI": {
            "Upload": {
                "FileSizeLimit": 104857600
            }
        }
    }
}
Keep the token out of source control. For local development use
dotnet user-secrets; in hosted environments use the platform's configuration or secret store.
4. Enable the integration
Quickchannel is added to the site through the service configuration. The extension methods live in Screen9.Optimizely.Extensions.
In Startup.ConfigureServices, after services.AddCms(), add:
using Screen9.Optimizely.Extensions;

services.AddScreen9Integration(_configuration);
services.AddScreen9TinyMCEIntegration();
AddScreen9Integrationregisters the content provider, the Quickchannel asset pane and the plugin's views.AddScreen9TinyMCEIntegrationregisters the TinyMCE plugin and adds the Quickchannel button to the default editor toolbar. Skip this call and the button will not appear.
Rebuild the project after installing the package. The build step copies the frontend files into modules/_protected/Screen9.Optimizely.CMS.UI; without a rebuild the asset pane stays empty.
5. Use Quickchannel videos
Videos from the Quickchannel platform appear in the Screen9 Video asset pane.
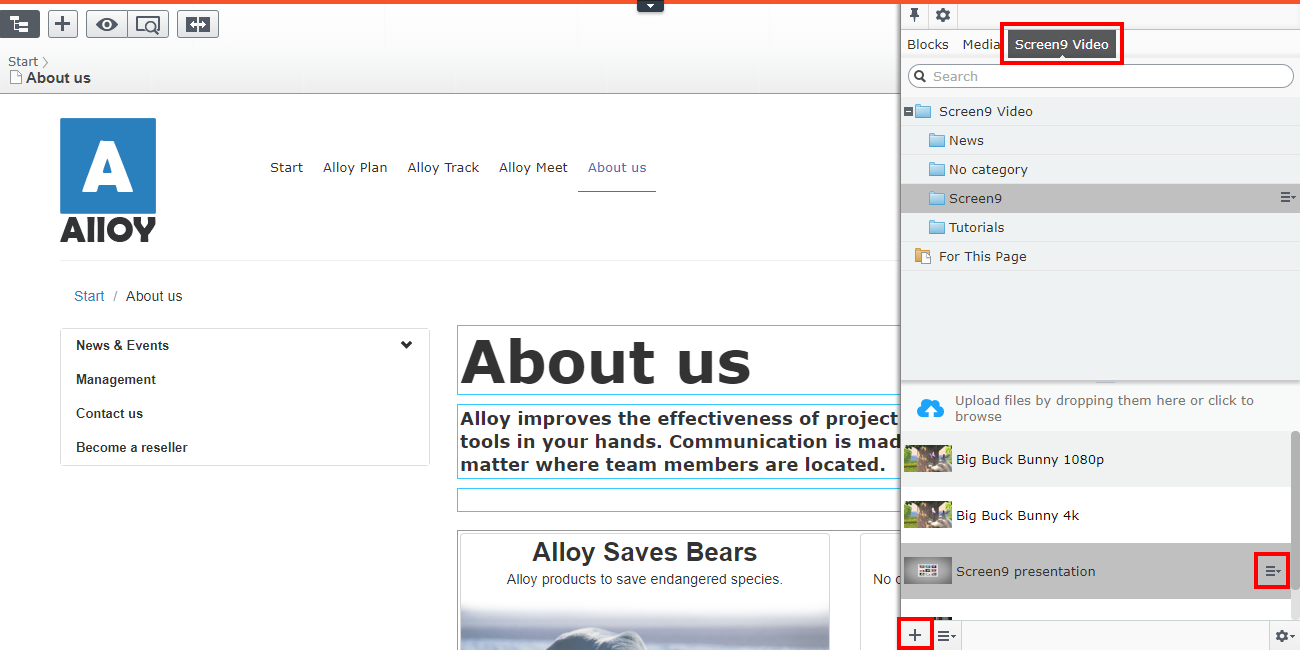
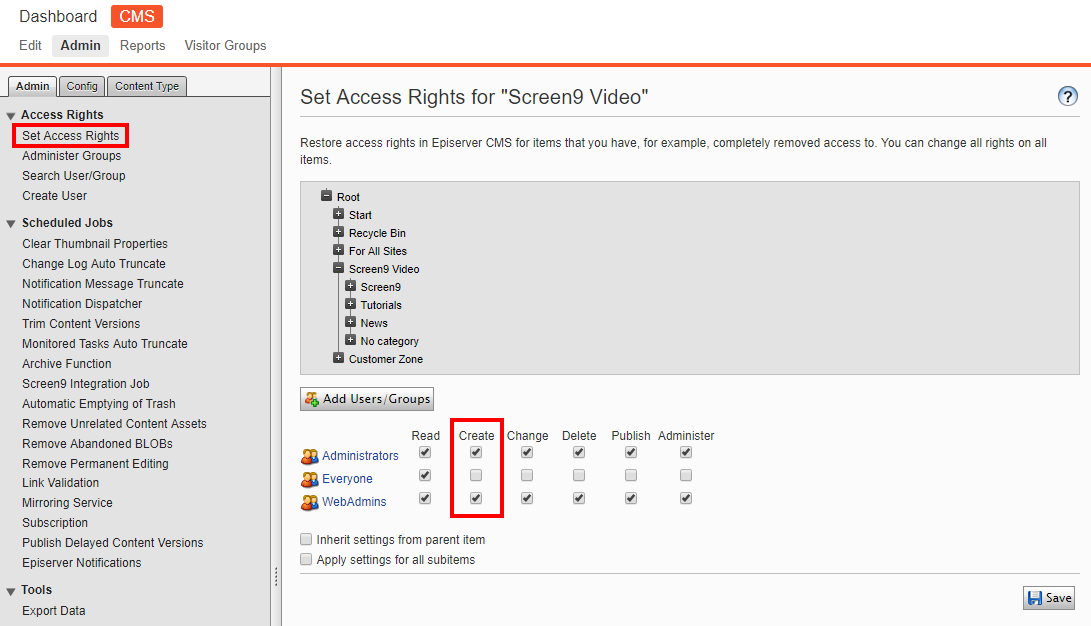
Disable uploading from the asset pane by changing the Create access rights on the Screen9 Video content folder.
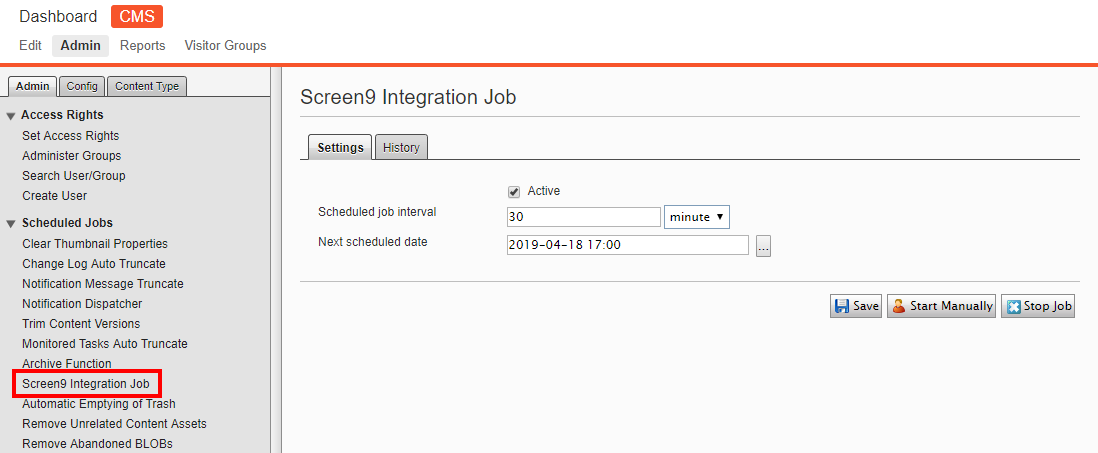
Refresh interval. The media list updates every 30 minutes by default. Change it under Admin → Scheduled Jobs → Screen9 Integration Job. Setting it below 5 minutes is not recommended. You can also refresh immediately with Start Manually.
6. The Quickchannel button in the TinyMCE toolbar
With AddScreen9TinyMCEIntegration() in place, the button is added to the default toolbar automatically – no further configuration is needed.
You only need the manual step below if your site defines its own TinyMCE toolbar for a property and the button does not show up there:
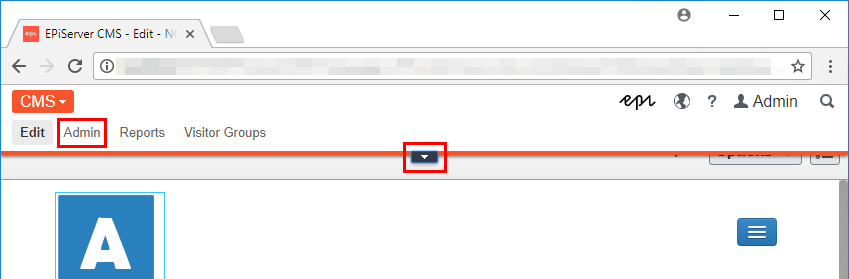
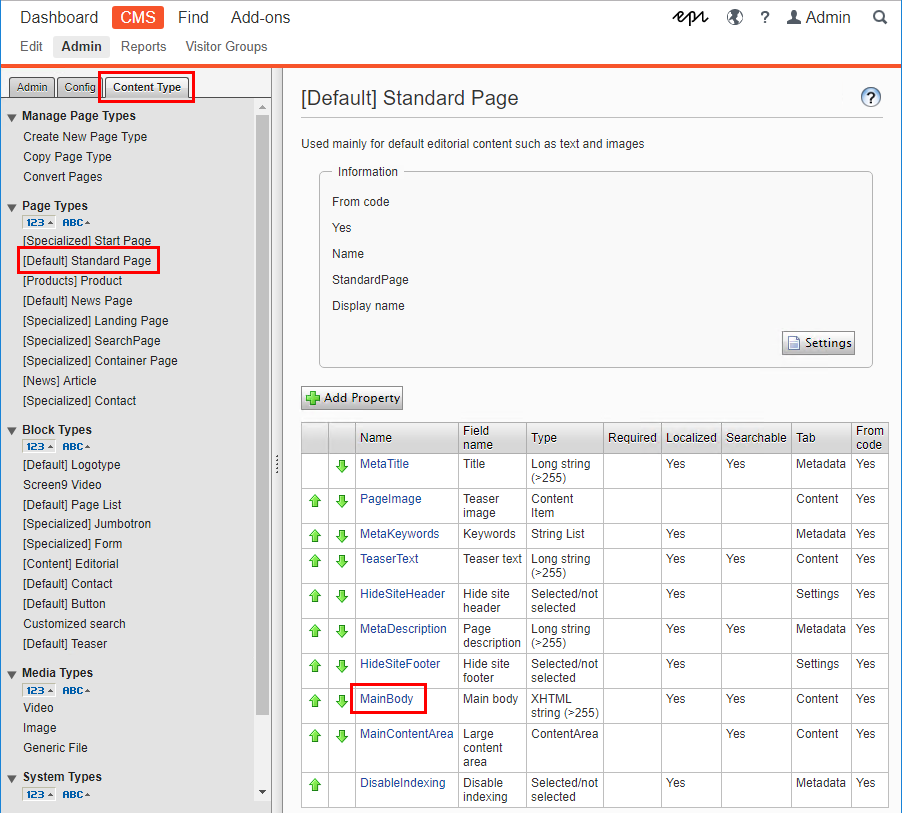
- Log in and go to CMS → Admin
- Open Content Type, select the page type (for example [Default] Standard Page) and the property (for example MainBody)
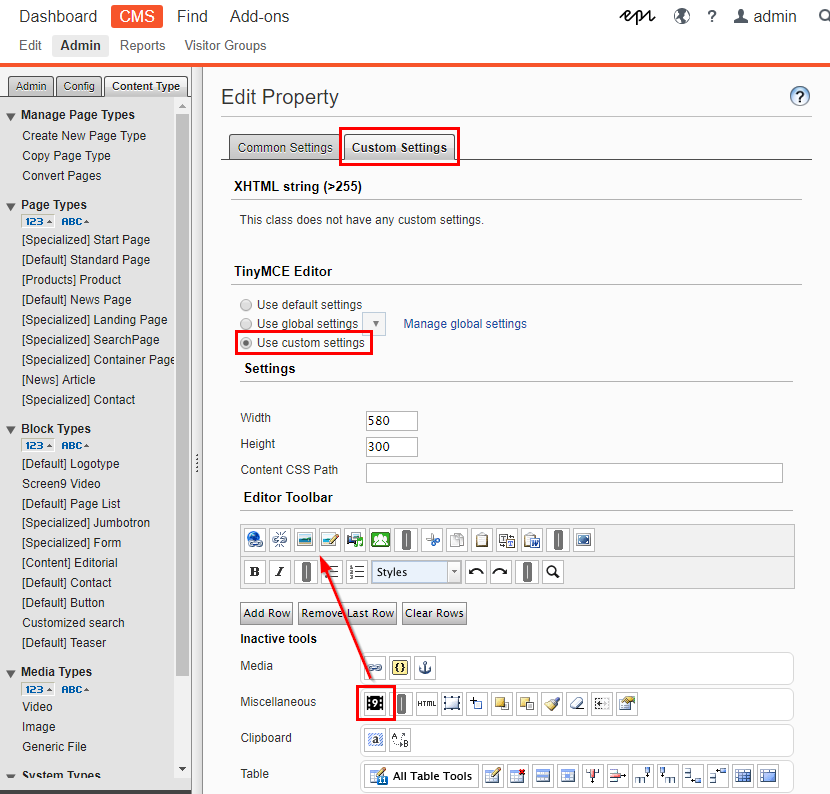
- On the Custom Settings tab, choose Use custom settings under TinyMCE Editor
- Drag the Quickchannel video icon from Miscellaneous into the toolbar – next to the image icon is a good position
- Press Save
7. Verify the installation
- The Screen9 Video folder is listed in the asset pane and shows media with thumbnails
- Admin → Scheduled Jobs contains Screen9 Integration Job, and a manual run reports how many folders and media were processed
- The Quickchannel button in the TinyMCE toolbar inserts a working embed
8. Troubleshooting
The asset pane is empty or the Screen9 Video folder is missing
- Rebuild the project and confirm that
modules/_protected/Screen9.Optimizely.CMS.UIexists - Check the log. A missing or incomplete configuration is reported as "Screen9: … The content provider was not registered."
- Verify
AccountId,RestApiTokenand thatDisabledis nottrue - Clear the browser cache – client-side modules are cached aggressively
Media is listed but thumbnails are missing
Run Screen9 Integration Job manually and read its result message. The job reports the reason for any failure and leaves previously synchronized data untouched when the service is unreachable.
The Quickchannel button is missing from the editor
Confirm that AddScreen9TinyMCEIntegration() is called and that it runs after services.AddCms().
An uploaded video is not visible
The REST API token needs the Full access level for uploads from Optimizely.
For more information about using the plugin, see How do I use the Quickchannel Optimizely plugin?